2010年4月30日星期五

How to Convert MKV Files

Next is the detailed guide to teach you how to convert MKV files with Aiseesoft MKV Converter.

Step 1 Free download Aiseesoft MKV Converter, install and run the software.

Step 2 Click Add File button to import your MKV files.

Convert MKV Files

Step 3 Click Effect, Trim, Crop to edit output video file.

Tips: Effect is used to adjust video Brightness, Contrast, Saturation; Trim can edit the start and end time of the output video; Crop function can adjust video aspect ratio.

Step 4 Choose your ideal output format from Profile list and click Browse… button to set destination folder to save the converted MKV file.

Step 5 After setting all parameters, press Start button to start MKV to video conversion.

In addition, this professional MKV to Video Converter provides powerful editing functions (Merge, Snapshot, Preview etc.) for you to make use of. Know more functions at: Convert MKV files.

2010年4月28日星期三

How to Transfer Files from PC to Your iPhone

Next let us learn how to transfer files from PC to your iPhone with Aiseesoft iPhone Transfer.

Step1 Download and install Aiseesoft iPhone Transfer. The interface is like:

Transfer Files from PC to Your iPhone

Step2 Run the software, and connect your iPhone/iPod to your computer via USB cable.

Step3 Click PC to iPhone to seek the files or folders that you want to import to iPhone and click OK. The process of transferring will be finished instantly.

Besides, Aiseesoft iPhone Transfer can transfer all video and audio files or folders accepted by iPhone. These formats include MP4, M4V, MP3, WMV. Strong search function can find files you need easily. Possessed of friendly user-interface, it is easy to operate, even for the new users. Just connect it with your iPhone, all the process can be finished in few clicks.

Want to transfer from PC to iPhone fast and conveniently, please try easy-to-use Aiseesoft iPhone Transfer. More information at: Transfer from PC to iPhone.

2010年4月27日星期二

How to Convert MOV to MP4 on Mac

To install it, simply mount the .dmg archive by double-clicking it. Run this program on your computer:

How to convert MOV to MP4 on Mac

Tutorial for converting MOV files to MP4 on Mac:

Step 1, Add MOV video files to the software by clicking the "Add File" button or just drag files you want to convert and drop them into the program.

Step 2, Select output format as MP4 and choose output directory

Use the "Profile" on the bottom of the window to control the output format. Open drop-down menu and select "MPEG-4 Video" as the output format.

convert MOV to MP4 Mac

Tip: You can change the Resolution, Encoder, Bit rate and Frame rate of the MP4 video and Sample Rate, Channels, Encoder and Bit Rate of Audio clicking "Settings" or merge your selected files into one by clicking "Merge into one file".

Use the "Browse" button to select an output directory to save converted MP4 videos.

converting MOV files to MP4

Step 3, After all the preparation steps before, just click "Start" to convert MOV to MP4 Mac. If you want to trim, crop and more editing, please go to How to convert MOV to MP4 on Mac directly.

2010年4月26日星期一

T-Mobile’s HD2 Has Great Screen, Weak Software

For all the buzz about tablet computers, the hottest category among small digital devices remains the super-smartphones, those pocket-size, touch-screen computers for running apps.

Apple this week reported strong sales of its iPhone. New phones running Google’s Android software platform seem to appear almost monthly and reportedly sell briskly. As these phones have added capabilities, some have gained larger screens. While Apple has stuck with a screen that’s 3.5 inches diagonally, some Android phones sport 3.7-inch screens. Now there is a competitor with a truly huge screen—4.3 inches. It’s the HD2 from Taiwan-based HTC, and it is being sold by T-Mobile in the U.S. for $199 with a two-year contract.

2010年4月25日星期日

Is This a Preview of the iPad App Store?

If you’re impatient, here’s the summary of the 90-second video: It shows a bunch of iPad-specific apps.

Beyond that, there’s not much to say other than the fact that Yahoo (YHOO) and Reuters appear to be the only two media companies that have a spot in iTunes’ coveted “new and noteworthy” showcase. But given that we don’t know if this video is current (or even real), it’s hard to imbue any of this with much meaning.

I do have a request for iPad leakers, though: If you have access to a review copy, could you let us know which Web sites Apple (AAPL) has pre-bookmarked for reviews? Because that may tell us something.

Here’s why: A Web publisher tells me that Apple approached this source’s company this winter and encouraged it to prep its site for the device. That is: Lots of HTML5, no Adobe (ADBE) Flash. In return, the publisher is supposed to get a boost from Apple via endorsements like pre-installed bookmarks and the like. Thanks in advance for your help.

2010年4月23日星期五

How to Convert FLV to MOV

Step-by-Step guide to learn how to convert FLV to MOV with Aiseesoft FLV Video Converter.

Step 1: Free download Aiseesoft FLV Video Converter and install it.

Step 2: Add FLV files.

Click Add File button to add your FLV files.

Convert FLV to MOV

Step 3: Set output format and output folder.

Choose the file you want to convert, click "Profile" drop-down button to choose "MOV – QuickTime Video(*.mov)" as your output format.

After choosing a profile, you can adjust parameters by clicking Settings button.

Click Browse… button to choose destination folder for saving your converted MOV files.

Step 4: Start to FLV to MOV conversion.

Click Start button to start the FLV to MOV conversion.

This powerful Youtube FLV Video Converter can convert FLV and Youtube videos to all popular video formats with powerful editing functions like Merge, Trim, Crop, Effect and so on. Want know more about Aiseesoft FLV Video Converter, please visit: Convert FLV to MOV.

2010年4月21日星期三

How to Convert M2TS to WMV

In the following, we shall get familiar with how to convert M2TS to WMV using this perfect M2TS to WMV Converter!

Firstly, we must confirm the M2TS to WMV Converter has been successfully installed, and then start it until we see the following interface:

M2TS  to WMV

Secondly, drag and drop M2TS files you want to convert to WMV to the play list. You can add one or more files and can also merge them into one for outputting.

Thirdly, in the Profile option, click the down-arrow to expand the menu and choose WMV as your output format. In the Destination option, you could choose one folder to save your files in order to find them easily later.

Fourthly, only click "Start" button to finish the conversion work - convert M2TS to WMV.

Want further editing functions? Go to how to convert M2TS to WMV .

How to Make iPhone Ringtone

You bought an iPhone and love all its features, but wish you didn't have to pay for your songs twice to get a ringtone. (We know that iPhone, iPhone 3G Ringtones use the file extension .M4R. And the users must pay $2 for a piece of song through Apple iTunes store). There are plenty of songs in your music library, but no way to make ringtones from any of them. Rihgt?

Actually, with a little bit of trickery (nothing illegal) you can create ringtones from any one of your non-DRM songs.

This works on both Mac and Windows PCs.

Window Users

You can create free iPhone Ringtones by yourself with Aiseesoft iPhone Ringtone Maker.
You can take the following step-by-step instructions to start.
Step 0: Download and install Aiseesoft iPhone Ringtone Maker.
After a short while, you can see the following interface:

iPhone Ringtone Maker

Step 1: Click "Browse" on the right side of "Input File" to import the file that you want to make ringtone from it.
Step 2: Play it and listen the music to find the segment that you want to use it as ringtone. Then drag and click the start & end slider to set your wanted segment, or type the start & end time in the corresponding text box directly to get the exact segment. You also can pre-listen the converted audio before generate.
Step 3: Click "Browse" on the right side of "Local Output Folder" to choose the output destination.
Step 4: Check "Export to iPhone" option, the converted ringtone will be load to your iPhone directly.
Step 5: After all the settings are finished, click "Generate" to begin making your own iPhone ringtone.

Key function
* Convert any video to iPhone ringtone M4R
* Create iPhone ringtone from any audio files
* Get any clips from video and audio
* Edit Added iPhone ringtones

Using Aiseesoft iPhone Ringtone Maker, you are free to edit the added iPhone ringtone by removing it or renaming it directly.

For Mac Users, please go to Aiseesoft iPhone Ringtone Maker for Mac.

2010年4月20日星期二

How to Rip DVD to Divx

Step by step guide to rip DVD to DivX

Now you can freely enjoy classic DVD movies on various portable devices like iPod, iPhone, iPhone 3G S, once own the powerful DVD ripper software. Follow the 1-2-3 steps, you will find the conversion from ripping DVD movie to DivX is so easy and fast.

Step 1

Download Aiseesoft DVD Ripper and install it to your PC. Then load your loved DVD disc from targeted drive.

rip DVD to Divx

Step 2

After loading the DVD movie, you can rip DVD to DivX in segment or convert DVD to DivX in whole file. Just using the "Merge" feature to finish it.

Step 3

Edit DVD files for better ouput DivX file.

Step 4

Choose "DivX" video format from the video format list, and click the "Start" button to start the DVD to DivX conversion.

Note:

If you like the current screen of the DVD, you can snapshot it for collection.

3. More info from: Rip DVD to DivX.

2010年4月19日星期一

How to import music from iPod to iPod without iTunes

Ever since iPod was released, millions of people have been crazy about it. There appeared some assistant tools to manage iPod without iTunes:

1.Aiseesoft iPod Manager for Mac is one of the best Mac tools that can transfer Mac to iPod Shuffle, iPod backup for Mac. It is the best for iPod iTunes Mac software.

2.Aiseesoft iPod Transfer is another Windows all-in-one tool including iPod to iPod Transfer, computer to iPod Transfer and iPod to computer transfer.

Part One: How to manage iPod without iTunes on Mac. (Transfer Mac to iPod Shuffle, iPod Backup for Mac)

1.Download and install Aiseesoft iPod Manager for Mac.

2.Connect iPod to Mac via USB.

Transfer Mac to iPod Shuffle:


Select “Music”, “Video” or “Picture”. Then click “Mac to iPod” to choose the files you want to transfer to iPod. Click “Open” to finish the transfer.

iPod Backup for Mac:


Select files you want to backup. Click “iPod to Mac” and find the place where you want to transfer your iPod files to your Mac and click “Open”.

Part Two: Computer to iPod Transfer, iPod to iPod Transfer, iPod to Computer Transfer for Windows users

1.Download and install Aiseesoft iPod Transfer.
2.Connect iPod/iPhone to computer.


Computer to iPod Transfer
Click “computer to iPod” button to seek the files or folders that you want to import to iPod and click OK.

iPod to iPod Transfer
Pick the files that you need to transfer. Just click “iPod to iPod” button and it will show you the folder of another iPod that you want to transfer to. Click OK. The transfer can be finished automatically.

iPod to Computer Transfer
Check the file(s) you want to export in the file list. Click “iPod to computer” button to
select the destination of the exporting files and start exporting files.

Hope it helps you!

2010年4月16日星期五

iPod Compatible Video

This article is divided into four parts separately introduce what is iPod Compatible Video, which video format is better for Apple iPod Video, is my video iPod compatible and how to make the video compatible with your iPod.

Part One: What is iPod Compatible Video?
Part Two: Which video format is better for Apple iPod video?
Part Three: Is My Video iPod Compatible?
Part Four: How to make the video compatible with your iPod?

Part One: What is iPod Compatible Video?

Firstly, I will introduce you what is iPod Compatible Video, iPod Nano Compatible Video such as iPod Video MP4, iPod Video H 264, the specifications page lists the following:
Apple iPod video specifications from their official website:

H.264 video, up to 1.5 Mbps, 640 by 480 pixels, 30 frames per second, Low-Complexity version of the H.264 Baseline Profile with AAC-LC audio up to 160 Kbps, 48kHz, stereo audio in .m4v, .mp4, and .mov file formats;

H.264 video, up to 2.5 Mbps, 640 by 480 pixels, 30 frames per second, Baseline Profile up to Level 3.0 with AAC-LC audio up to 160 Kbps, 48kHz, stereo audio in .m4v, .mp4, and .mov file formats;

MPEG-4 video, up to 2.5 Mbps, 640 by 480 pixels, 30 frames per second, Simple Profile with AAC-LC audio up to 160 Kbps, 48kHz, stereo audio in .m4v, .mp4, and .mov file formats

That’s a little confusing, but there’s only a few numbers you’ll need to remember for each format.

The highest video bitrate with the H.264 codec is 768 kilobits per second. The biggest picture size for your H.264 movie is 320 pixels wide by 240 pixels high, the exact dimensions of your iPod’s screen. Your iPod can play H.264 video at framerates up to 30 frames per second. Every one of the applications that we’ll be using encodes with the Baseline Profile. Your audio needs to be encoded as AAC audio up to 160 Kbps, 48 kHz, and it can be in either stereo or mono. As long as you follow all the guidelines, your movie can be a QuickTime movie or an MPEG-4 movie file.

Your other option, MPEG-4 video, supports a much higher bitrate than H.264 video - 2,500 kilobits per second. Using higher bitrates will also create larger files. The result: you’ll have less space for additional songs and movies. The biggest picture size for your MPEG-4 video is 480 pixels wide by 480 pixels high - three times as many pixels as your iPod’s screen is capable of displaying. Your iPod will shrink the picture proportionally so that everything fits on the screen. Again, the iPod can play videos up to 30 frames per second and our audio and file format options are the same as H.264 video.

Part Two: Which video format is better for Apple iPod video?

That’s a tough question. H.264 is arguably better because it offers high quality and a much smaller file size when compared to MPEG-4. However, both formats look quite good when you encode your video at the higher supported video settings. One thing that most people will agree on is that H.264 video takes longer to encode than standard MPEG-4. This means that converting a two hour movie to iPod video can take considerably longer using the H.264 codec (especially with QuickTime Pro’s pokey Export: Movie to iPod video option). Still, I prefer the H.264 codec in most instances.

Part Three: Is My Video iPod Compatible?
Some of the video files that you download from the web or from file sharing networks like BitTorrent may be iPod compatible - even if they’re not marked as such.

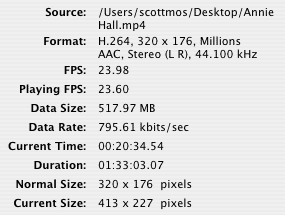
The easiest way to determine whether a video can be played on your iPod is to open the file in QuickTime and select Window: Show Movie Info. In most cases your video should be iPod-ready if the format is H.264 or MPEG-4, the audio is AAC, and the size of your video is 320 x 240 (or smaller) for H.264 or 480 x 480 (or smaller) for MPEG-4. Also, look at the data rate and make sure it’s not over 900 kbits/sec for H.264 or 2600 kbits/sec for MPEG-4.


Part Four: How to make the video compatible with your iPod?

If you have QuickTime Pro ($30 and worth every penny) or the latest version of iTunes (free!), this is, by far, the easiest conversion that we’ll talk about.
In iTunes, after you’ve added your video to the library, right click it. Select [b]Convert Selection for iPod[/b]. iTunes will let you know if your video is already in the correct format. If it’s not, your video will slowly be converted to an H.264 video.

UPDATE: I’ve heard several complaints of iTunes creating iPod videos without sound. You should probably avoid using iTunes to convert your videos.

In QuickTime Pro, open your movie and, in the file menu, select Export… and in the export drop-down, select Movie to iPod (320 x 240) and click Save. QuickTime will create an optimized H.264 video with AAC audio.

You may want to go pour yourself a cup of tea or take a nap. If your file is large, QuickTime’s slow conversion process can take several hours.

If you’re an inexperienced user, I recommend using QuickTime Pro or iTunes because they’re absolutely foolproof. However there are other much faster, more powerful applications for converting your videos. Read on!

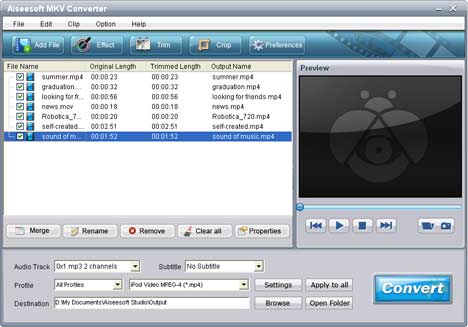
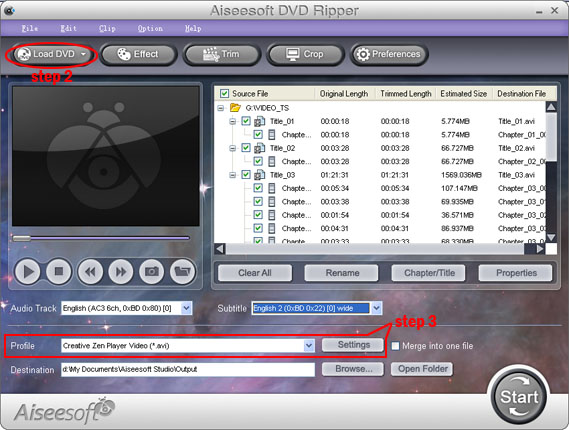
Don’t have QuickTime Pro? Aiseesoft iPod Video Converter!

Aiseesoft 
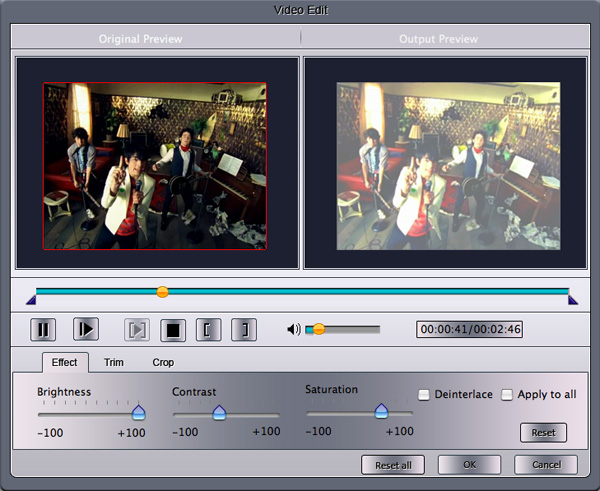
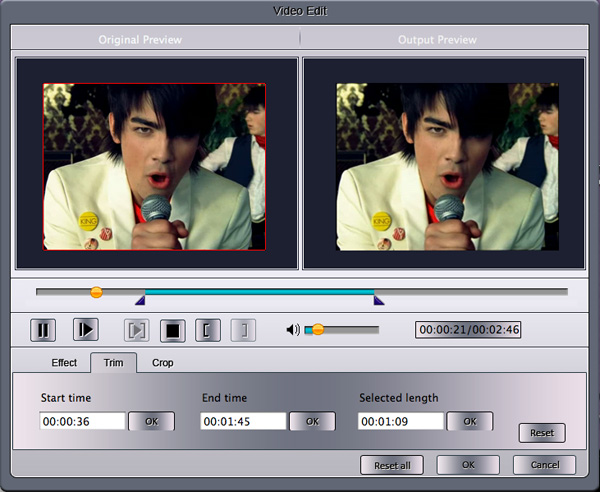
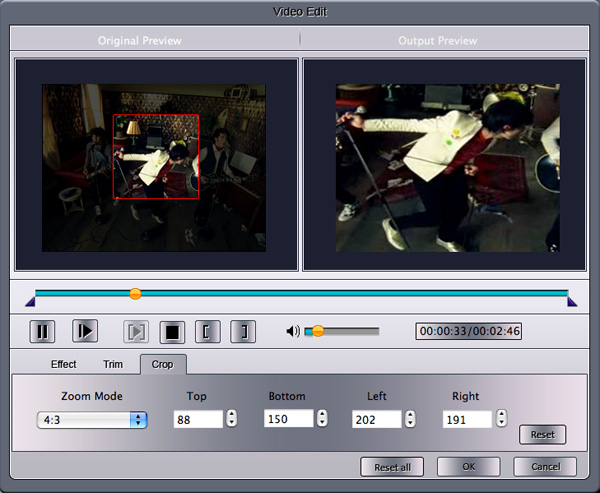
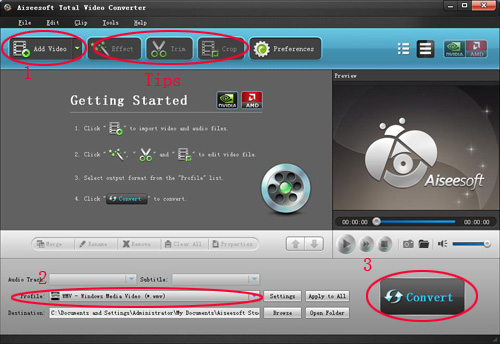
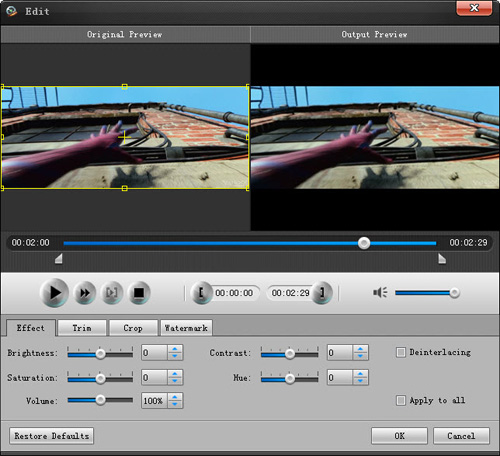
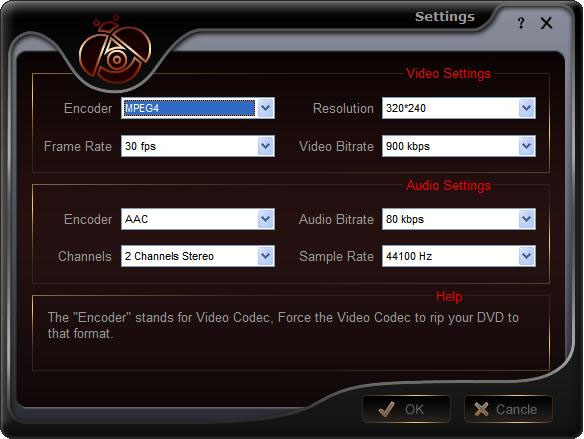
iPod Video Converter supports so comprehensive video formats including converting MPG, MPEG, MPEG2, VOB, MP4, M4V, RM, RMVB, WMV, ASF, MKV, TS, MPV, AVI, 3GP,3G2, FLV, MPV, MOD, TOD to iPod Video MP4, iPod Video H 264. You can customize your own output video by the settings function. For example, if you want a high quality video you can raise the values of Video Biterate, Audio Biterate and Audio Sample Rate, if you want a smaller file you can reduce the value.


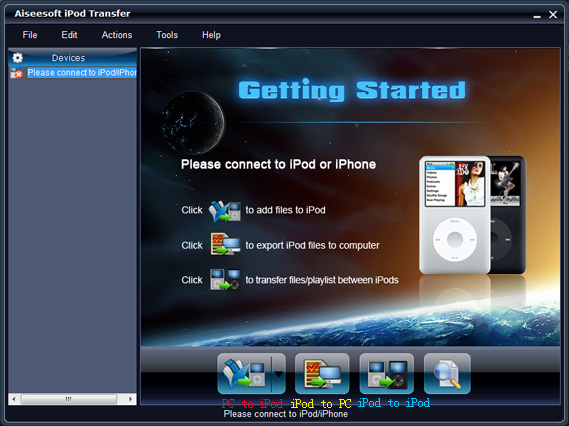
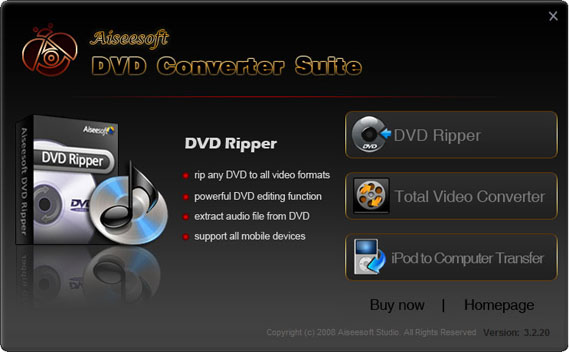
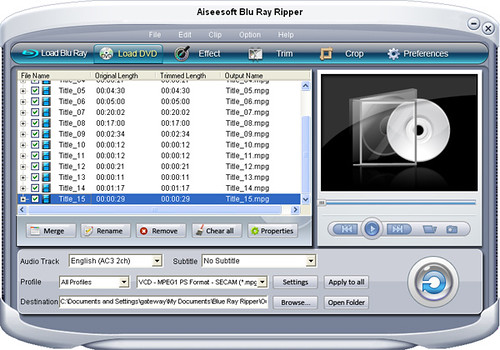
If you want to make your DVD compatible with your iPod and even transfer your iPod video to Computer, you can choose Aiseesoft DVD to iPod Suite which is an all-in-one solution to convert DVD to iPod Video MP4, iPod Video H 264 and convert video to iPod Video MP4, iPod Video H 264. Moreover, it can transfer video from iPod to computer. You don’t need to worry about losing anything.

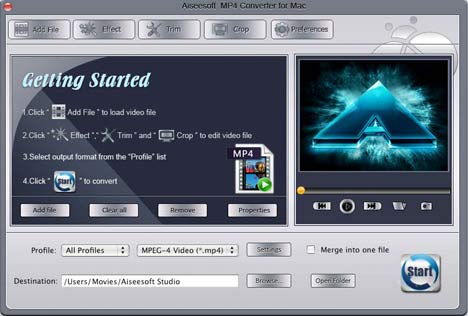
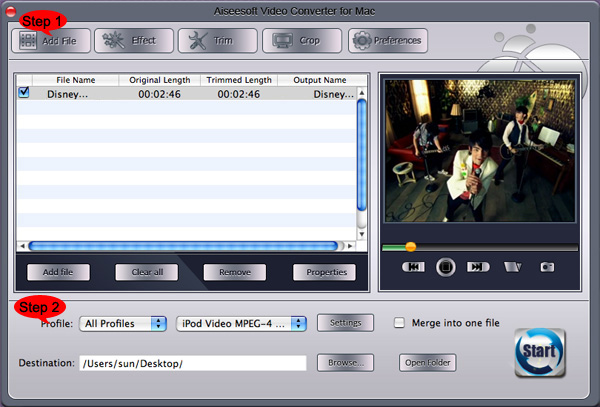
For Mac user, you can choose Aiseesoft iPod Video Converter for Mac and Aiseesoft DVD to iPod Suite for Mac.

2010年4月13日星期二

How to Convert Video Files on Mac/Windows

Nowadays, people can enjoy videos in different ways, such as youtube.com and other online video websites, iPod/Zune and other portable players, and also play video on computer, and you can also make you own videos with windows movie make or iMovie for Mac users. So how to convert videos between different video formats is a big problem for both windows and Mac users. Today I will share you guys two powerful video converter for Mac and Windows users.

For Mac users, this powerful video converter for mac is really nice.
Let's use it to convert a video for Example


Step 1: Add File
Click “Add File” button to load the video you want to converter

Step 2: Choose profile and adjust settings
You can find your output video format from a drop-list called “Profile”
You can also adjust the specific settings of the output video, such as “Resolution”, “Bitrate”, “Encoder” and so on.

Step 3: Edit Video
1. Effect:
You can adjust the “Brightness”, “Contrast”, “Saturation” and “Volume”


2. Trim:
You are allowed to pick up any part of the video to convert.


3. Crop:
To remove the black edges and choose a play area to convert.


Step 4: Start Conversion
Click “Start” button to begin your conversion and you will get your video soon.

For Windows users, you need Total Video Converter.


Step 1: Load Video
You can load your videos into the converter by clicking “Add File”

Step 2: Choose output info
This converter provides you many output profiles for you to choose, you can choose your output profiles according to your need. And also you can just choose a certain video format.

You can also adjust the settings of your output profiles. You can even save a certain settings as your own output settings.


Step 3: Conversion
Click “Start” button to begin your conversion and few mins later you can get your video.

Tips: How to effect, trim and crop the video to improve your output video quality.
After your Load your video you can click “Effect” button to access the effect panel

1: Effect
Adjust the video effect as you want: Brightness, Contrast, Saturation and Deinterlacing.


2: Trim
Clip your video, pick up any part of your video to convert.
You have 3 ways to do trim:

1.Dragging the slider

2.Controlling the “Trim From” and “Trim To” button

3.Setting the Start and End time


3: Crop
Adjust video size, Cut off the black edge of your video to let you enjoy your movie in full screen by click the 'Crop' button
You have 2 ways to do crop:

1.Move your mouse cursor onto one of the eight small adjustment boxes on the cropping frame and drag the crop frame to crop the video such as cutting off top and bottom black bar. The cropped result will be shown on the Output Preview at the same time

2.Type the value directly or set the value in "Left", "Right" and "Cropped area size" area to set the position of the cropping frame.


You can also select the aspect ratio from the Zoom Mode drop-down list. There are 4 choices for you: Full Screen, 16:9, 4:3 and Keep Original.

2010年4月12日星期一

How to rip a DVD, convert video and transfer music from ipod to computer

This guide aims to show you how to rip a DVD, convert video and transfer music from ipod to computer with only one tool.
It includes 3 parts:
Part 1. How to rip DVD to iPod/iPhone/Sansa/PSP/Zune and other MP4 and MP3 Players
Part 2. How to convert all video to MP4, AVI, FLV, 3GP, WMV, MOV, MPG, RM, RMVB, MKV, VOB…
Part 3. How to backup iPod songs and videos on your computer


Believe or not, to do the things above what you need is download Aiseesoft DVD Converter Suite and few clicks.


Part 1. How to rip DVD to iPod/iPhone/Sansa/PSP/Zune and other MP4 and MP3 Players.
Step 1. Click “DVD Ripper” on the main interface to run Aiseesoft DVD Ripper.


Step 2. Open your DVD Drive and put your DVD in it, then click “Load DVD” and choose “Load DVD” to load your DVD into this best DVD ripper.
Step 3. Choose your output format from the “profile” drop-down list. This best DVD ripper provides you so many formats that out of your expectation, such as “iPod video MPEG 4 (*.mp4)”, “iPhone 3G MOV 640*480 (*.mov)” and so on.

After you choose your output format, you can adjust your output video’s settings, such as “Resolution”, “Frame Rate”, “Bitrate”, “Sample Rate” and so on.
Click “Start” now to begin your conversion and you will get your video soon.

To make your output movie more enjoyable you can do some editings to it through this best DVD ripper. You can choose a part of your movie to convert (trim), remove the black edges of your DVD movie (crop) and also adjust the effect (effect) and select subtitle and audio track.


Part 2. How to convert all video to MP4, AVI, FLV, 3GP, WMV, MOV, MPG, RM, RMVB, MKV, VOB…

Step 1. Click “Total Video Converter” on the main interface to run Aiseesoft Total Video Converter


Step 2. Click “Add File” to load the video you want to convert.
Step 3. Choose output format by clicking “profile” and customize your own output video by
clicking “settings” to adjust the Resolution, Frame Rate, Bitrate and so on.
Before you click “Start” to begin your conversion, you can do some editing works, such as pick up a part of your video to convert(trim), choose your own play region(crop) and put two or more files into one.(merge into one file).
OK, now you can begin your conversion.

Part 3. How to backup iPod songs and videos on your computer.
Step 1. Click “iPod to Computer Transfer” to run Aiseesoft iPod to Computer Transfer.


Step 2. Plug your iPod to your computer and the Aiseesoft iPod to Computer Transfer can automatically scan and find your iPod.
Step 3. Choose the songs and videos you want to backup.
Step 4. Click “export to PC” button to transfer your songs and videos to your Computer.

2010年4月11日星期日

Tips for MTS, TS, M2TS High Defination Video Format

More and more people have their own Camcorder to record their life, family parties and something important to them.
But there are some problems when you:
1. When you want to edit them in Windows Movie Maker or some other edit software
2. When you want to put them into your portable media players, such as iPod, iPhone, Zune, Creative Zen and so on
3. When you want to watch them on some HD video players, such as Xbox, PS3, Apple TV and so on.
4. When you want to share your videos with your friends on youtube, myspace and other online video website.
All the problems' reason is the video format, MTS.
The video format of your HD Camcorder is MTS, and it is not supported by almost any video editing software, PMP, HD video Player and youtube.
So you have to convert it to common video formats.

Tip 1: Some knowledge about MTS, M2TS, TS

MTS format is a high-definition MPEG, AVC, H.264 transport stream video file format which commonly used by HD camcorders such as Sony, Canon, Panasonic, JVC. etc.
.MTS files are used primarily with Sony hardware. Camcorders make use of MTS in the form of AVCHD, a format for recording and playback of high definition video.
M2TS is a Sony high definition video file type. M2TS files are raw AVCHD videos recorded using Sony's camcorders, such as the HDR-SR(xx)series models. Panasonic, Canon and other brands of AVCHD camcorders also record in M2TS format.
TS (Transport Stream) is a communications portocol for audio, video, and data. It is a type of digital continer format that encapsulates packetized elementary streams and other data.

Tip 2: How to solve the 4 problem above.
It is easy to imagine that i met those problems when i got my first HD Camcorder. But now it is really easy for me to solve those problems.
The most important thing is convert your MTS file to other video files.

And here i recommend you Aiseesoft MTS Converter

The following is a simple guide for you:


Step 1: Load Video
Click “Add File” to load the video that you want to convert to Aiseesoft MTS Converter.

Step 2: Choose Your Output Profile and Settings
From “Profile” drop-down list you can choose your output profile according to your need.
For example, if you have a iPod and you want to convert video for it, you need to choose “iPod” from the profile list and then it also provides the second chance to specify your iPod generation.
You can also click “setteing”adjust the settings of your output video, such as “video/audio encoder”, “Video/audio Bitrate”, “Channels”, “Resolution” and so on..

Step 3: Video Editing
This powerful MTS Converter allows you to do many video editings.
1. Click "Effect" to make special effect for your movie.
You can adjust the “Brightness”, “Contrast”, “Saturation” and also you can use “deinterlacing” to improve you output effect.
2. Trim:
“Trim” function allows you to pick up any part of your video to convert. You can just convert a part of your video that you want.
3: Crop:
Cut off the black edges of the original movie video and watch in full screen on your iPod using the "Crop" function.

Step 4: Conversion
After you have done all the steps above you can click “Start” button to start your conversion.

Tip 3:
If you want to know more about TS, you can have a look Aiseesoft TS Video Converter

2010年4月6日星期二

How to convert mts/m2ts/ts video and put them into iPod

As people have higher requirements about the quality of videos, more and more HD videos are emerging. And we come across a large number of HD videos in our daily life. Nevertheless, at the same time, these videos bring people many format troubles. Many people complain about the HD videos and the relevant converting issue, such as, what is HD, MTS format? Why do many people choose that format? How to convert the MTS, M2TS, and TS into the mp4 mpeg, mp3, etc? How to put the MTS and HD formats into iPod and iPhone?


Therefore, it is really necessary to read the following article that will answer all your questions, solve your problems. Most importantly, an ideal method will be offered to you.
High-definition video or HD video refers to any video system of higher resolution than standard-definition (SD) videos, and most commonly involves display resolutions of 1280×720 pixels (720p) or 1920×1080 pixels (1080i/1080p). By using the HD Camcorder, such as, Canon HR10 Camcorder, JVC Everio GZHD7 , Sony HDR-HC1 MiniDV, people can get extremely high quality videos. As the video you record on your camcorder is MTS, TS, M2TS or other HD video format which can not be accepted by some popular portable players, so you have to convert them into normal video format to edit. Here I am will willing to share with you
how to convert MTS, TS, M2TS video to normal video formats. The following are the excellent tools.

MTS Converter


Steps:
Step 1: Load Video
Click “Add File” to load the video that you want.
Step 2: Choose Your Output Profile and Settings
From “Profile” drop-down list you can choose your output profile according to your need.
For example, if you have a iPod and you want to convert video for it, you need to choose “iPod” from the profile list and then it also provides the second chance to specify your iPod generation.
Step 3: Video Editing
This powerful MTS Converter allows you to do many video editing.
Step 4: Conversion
After you have done all the steps above you can click “Start” button to start your conversion.

The excellent software with the similar function are :

M2TS Converter
HD Video Converter.


Well, if , you also want to put the transferred videos from your iPod to your computer or to your friend’s iPod , the iPod Transfer is the best choice for you . It can easily transfer data between my iPod and iPhone, backup iPod data in your computer and put songs and videos from your computer to iPod/iPhone without iTunes.


How to transfer songs and videos from iPod to your computer, from computer to iPod and from iPod to iPod.


Click “Computer to iPod” button, it will allow you to transfer songs and videos from your computer to iPod easily.

Click “iPod to Computer” button, it will allow you to backup your songs and videos from iPod to your computer.

Click “iPod to iPod” button, it will allow you to transfer songs and videos from one iPod to another iPod dirrectly.


What’s more, If you want to put your own DVDs and you own videos on your iPod, PSP, and other players. You can resort to

DVD Converter Suite

2010年4月1日星期四

How to Rip Blu-Ray DVD and Common DVD

So, with the growth in living standard, people give more attention on relaxing themselves on spare time. Now the blu-ray movie is a nice choice. But you can not bring your DVD player with you anywhere, so put the movie on your PMP or Laptop is the best choice.

What is Blu-Ray DVD?
Blu-ray Disc (BD), sometimes called "Blu-ray," is an optical disc storage medium designed to supersede the standard DVD format. Its main uses are for storing high-definition video, PlayStation 3 video games, and other data, with up to 25 GB per single layered, and 50 GB per dual layered disc. The disc has the same physical dimensions as standard DVDs and CDs.


What is the different between the DVD and Blu-Ray DVD?
To be simple, Blu-Ray DVD uses a blue-violet laser as opposed to the red laser used on DVDs and it can hold a lot more information on them than DVDs, 25GB (single-layer)/50GB (dual-layer) but DVD and only take 4.7GB (single-layer)/8.5GB (dual-layer).


The images on blu-ray disc are sharper, brighter, and more detailed than any DVD movie. What manufacturers are trying to do is make the movie look as close to what you see in a real theater as possible, except for its a tenth the size and in your home.

Blu-Ray DVD is really nice but you have to play it on Blu-Ray player, do not worry, it can also play all your DVD movies smoothly.

Part 1: How to Rip Blu-Ray DVD to Video Format?

Tools you need:
1. AnyDVD- You can use the Trail Version. Get it here:
http://static.slysoft.com/SetupAnyDVD.exe
2. Blu-Ray DVD Driver
3. Blu Ray Ripper
Preparation:
You need to install AnyDVD, then run this Blu Ray Ripper


Step 1: Load your BD
Load your BD disc in to your blu-ray driver.
Step 2: Output Profile
Choose your output profile from the drop-down list according to your need. You choose output format as your devices and also with specific video format.
You can also set the specific settings of your output video, such as “resolution” “video bitrate” “encoder” and so on.

After you have done all the tings above, you need to click the start button to convert your blu-ray disc.

Tips:
You can also do many video editing works about your output video.


1. Effect:
You can adjust the “Brightness”, “Contrast”, “Saturation” of your output video and also you can select to use the “deinterlacing” function which make your video more enjoyable.
2. Trim
To pick up any part of your BD movie to converter, you can use “Trim” function.
3. Crop
You can choose any play area to convert by using the Crop function.
4. Watermark
You can add your own watermark on the output video, the watermark can be words and also picture. You can choose the font of your words and other really enjoyable function

Part 2: How to Rip Standard DVD to Video Format?


Step 1: Load your DVD
Put your DVD to your DVD Driver

Step 2: Choose your output profile
Choose your output video format according to your need.

Step 3: Video effects
You can do many video editing works with this really nice dvd ripping software. Such as trim, crop, merge and also you can add water mark to your output video.

Step 4: Conversion
Click the “Start” button to begin to rip your DVD.